
Window Installation Process
Most window failures — water intrusion, drafts, fogged glass, stuck sashes, trim rot — trace back to installation shortcuts, not bad windows. Incorrect flashing, inadequate air sealing, and openings that were never properly prepared are responsible for the majority of premature window performance problems. At Cupcake, every window is installed as a water-managed, air-sealed system — each opening treated as a penetration in the building envelope, not a swap-and-caulk replacement. For the full overview of replacement windows in the Greater Austin Metro, see the replacement windows overview.
The Window Installation Process
If pricing is your main question before reading further, see replacement window cost in Austin. This page covers what correct installation actually involves — and why it determines whether a window performs for 10 years or 30.
Installation Method: Cut-Back vs. Pocket-Fit
Before the eight-step process, there is a prior decision that shapes everything downstream: which installation method is right for this opening. The two approaches are cut-back and pocket-fit, and the choice is not a preference — it follows from the condition of the existing frame and rough opening.
A pocket-fit (insert) installation leaves the existing frame in place and seats the new window unit inside it. It is appropriate when the existing frame is structurally sound, correctly flashed, and free of moisture damage. A cut-back installation removes the existing frame entirely, exposes the rough opening for inspection and correction, and installs the new window flush to the structural framing — anchored to the structure with head flashing integrated into the building envelope. Cut-back is more labor-intensive and requires interior drywall patching and finish work after installation, which is why most contractors default to pocket-fit regardless of what the frame condition actually warrants.
We assess frame condition at the initial evaluation and recommend the appropriate method before anything is ordered. The full comparison of both methods — what each involves, where each is appropriate, and why the decision matters more than the window itself — is covered on the cut-back vs. pocket-fit installation page.
What “Installed Correctly” Actually Means
A correctly installed window manages four things simultaneously. Water management means flashing and drainage paths are built so water cannot get trapped in the wall — it has a defined path out. Air sealing means the perimeter gaps that let unconditioned air move around the frame are closed, not just caulked over. Structural support means the window is shimmed and fastened so it seats square and operates smoothly for years without binding or racking. Finish durability means the exterior detailing is matched to the substrate — brick, limestone, stucco, and fiber cement each require different approaches, and a detail that works on one will fail on another.
These are not premium add-ons. They are the minimum standard for an installation that performs as specified. Warranties only mean something when the work behind them is done correctly.
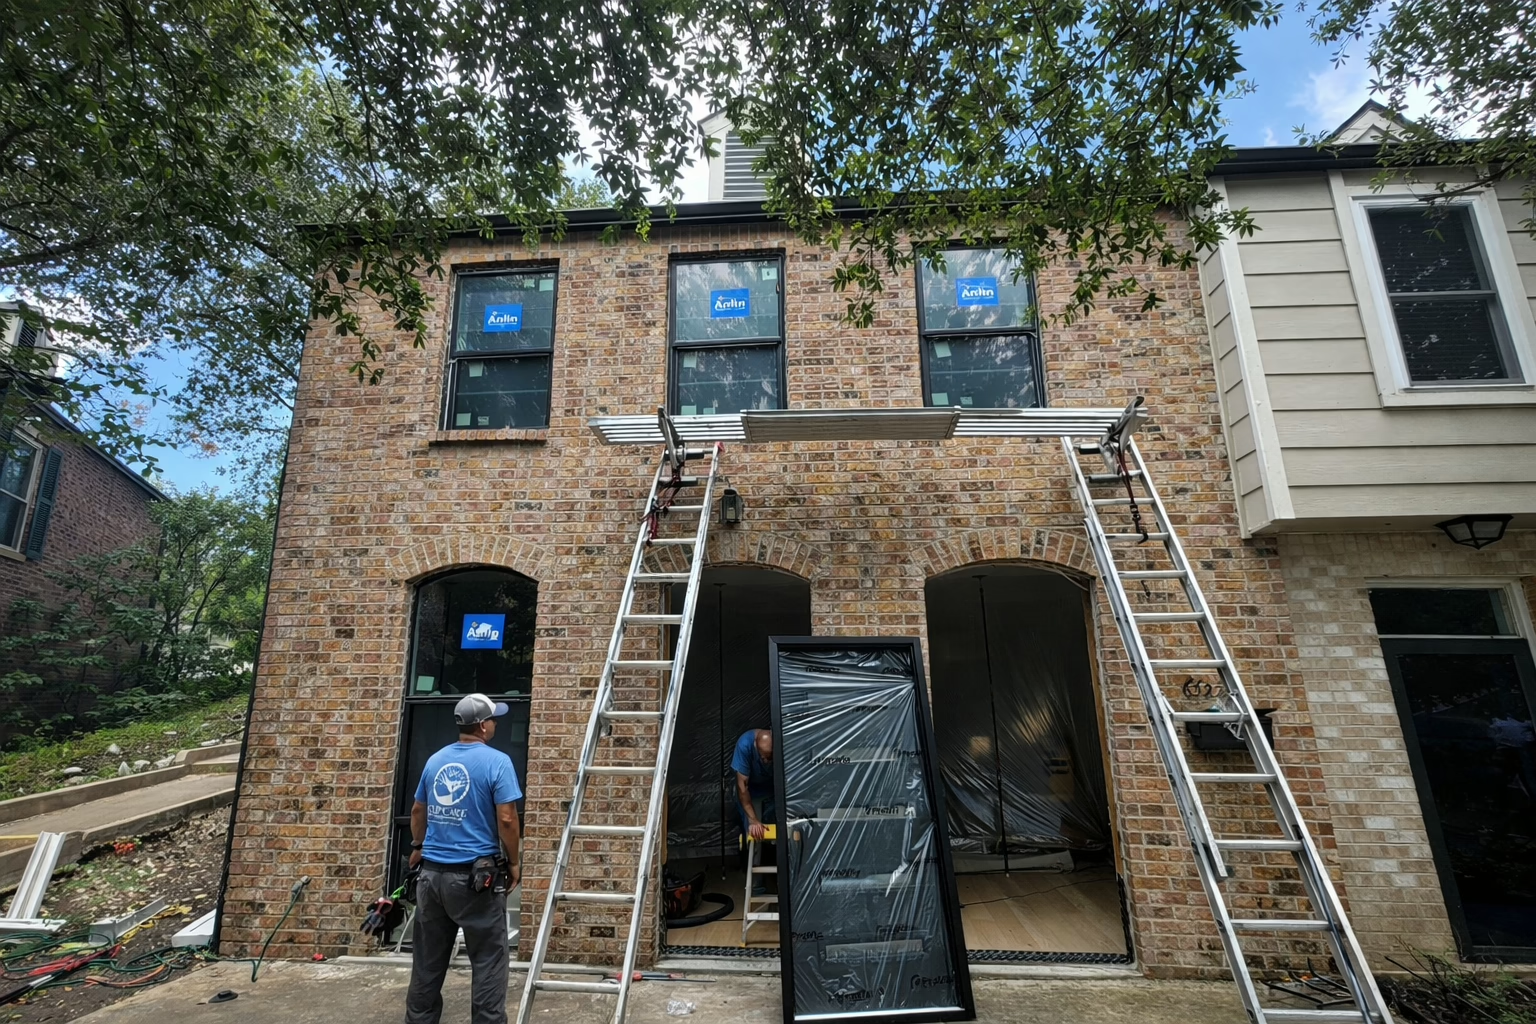
Step-by-Step: The Cupcake Window Installation
Pre-Install Protection and Jobsite Setup
Before anything is removed, floors, furniture, and walk paths are protected. Window specs are confirmed against the opening — size, color, glass package, and tempering requirements — to catch any discrepancies before tear-out begins. Materials are staged so the home is not exposed or disrupted longer than necessary.
Removal Without Damaging the Opening
Old windows are removed carefully to avoid cracking drywall, damaging brick or stone edges, or compromising the structural opening. Once the unit is out, the exposed framing and rough opening are inspected for hidden rot, water staining, termite damage, or failing flashing that was concealed behind the original window. Any issues found are documented and addressed before the new unit is installed — not discovered after.
Opening Prep: Clean, Square, and Ready to Seal
Before the new window goes in, the opening is prepared so the frame can seat and seal correctly. Old sealants and debris are removed. Sill condition and slope are verified — water needs a path out, not a pocket to collect in. Any conditions that would compromise sealing or long-term operation are corrected at this stage, when access is full and corrections are straightforward.
Water Management: Flashing First
This is the step most installers shortcut. We treat the window opening as a penetration in the building envelope and build protection accordingly. Flashing methods are selected for the wall type and window system — not applied as a generic layer. The sequence creates a drainage path so any incidental water that reaches the opening can exit rather than accumulate in the wall assembly. Transitions are sealed to resist wind-driven rain, which in Central Texas can be substantial.
Set, Shim, and Fasten: Operation Matters
Windows that bind, stick, or won’t lock properly are almost always installed out of square. The unit is set, shimmed, and fastened to manufacturer specifications — level and plumb verified, shimming applied to prevent frame twist, fastening schedule aligned with the specific product system. Getting this right at installation is what produces smooth operation for the life of the window.
Insulate and Air Seal the Perimeter
Drafts don’t come through glass — they come around the frame. The perimeter gap between the window frame and the rough opening is insulated and sealed to reduce air infiltration at its actual source. Insulation is applied without over-expanding, which can bow the frame and affect operation. Interior and exterior transitions are sealed appropriately for each substrate and exposure condition.
Exterior Finish That Matches the Substrate
Austin homes are commonly brick, limestone, stucco, or fiber cement — and each requires different exterior detailing. For limestone, we use mortar finish rather than relying on caulk against stone, which degrades and separates over time. Brick requires clean lines and durable transitions. Stucco requires careful integration to avoid cracking and water entry at the window edge. The detailing is matched to the material, not applied generically.
Final Quality Check and Homeowner Walkthrough
Every window is tested for smooth operation — open, close, and lock — before the crew leaves. Seals, weep paths, and finished edges are inspected. Glass is cleaned, debris is vacuumed, and the space is left in better condition than we found it. We walk through the completed work with the homeowner so the installation is understood and any questions are answered before closeout.
Why This Process Protects Your Warranty
Most window manufacturer warranties assume the product was installed according to documented standards. Improper flashing integration, incorrect fastening, or inadequate air sealing can void that protection — even if the window unit itself is without defect. Our 10-year workmanship warranty covers installation quality directly, separate from the manufacturer’s product warranty. Both require that the work was done correctly in the first place.
If you’d like to see what the consultation and assessment visit looks like before installation begins, that’s covered on the what to expect on your windows appointment page.
Frequently Asked Questions
How long does window installation take?
Most single window replacements are completed in a few hours. A full-home replacement of 15–20 windows typically runs one to two days depending on window count, installation method, and whether rough opening corrections are needed. We don’t leave a project with unprotected openings overnight. Your specific timeline is confirmed before the installation date based on scope.
What is the difference between cut-back and pocket-fit installation?
A pocket-fit (insert) installation seats the new window unit inside the existing frame, which stays in the wall. It is appropriate when the existing frame is structurally sound, correctly flashed, and free of moisture damage. A cut-back installation removes the existing frame entirely, exposes the rough opening for inspection and correction, and installs the new window flush to the structural framing with head flashing integrated into the building envelope. Cut-back is more involved and requires interior finish work after installation, but it is the correct method when the existing frame has deteriorated or was never correctly flashed. We assess frame condition at the initial evaluation and recommend the appropriate method before anything is ordered. The full comparison is on the cut-back vs. pocket-fit installation page.
What happens if hidden damage is found during removal?
We document the condition, photograph it, and discuss it with you before proceeding. The scope and cost of addressing any framing, moisture, or flashing issues are explained before work continues — you are not presented with a completed correction and an invoice. Most hidden damage found during removal is straightforward to address at that stage, when the opening is already fully exposed. It is significantly more expensive to address after installation is complete.
Do I need to be home during installation?
Access to the interior is required for most window work, but you don’t need to be present throughout the day. We coordinate a start time and access plan before the crew arrives and send progress documentation. For the final walkthrough, your presence is helpful — we want to go through the completed work with you directly so any questions are answered before we close out.
How can I tell if a window was installed correctly after the fact?
The clearest early indicators are operational: a correctly installed window opens, closes, and latches smoothly without binding or resistance. It should show no drafts when closed and latched. Water staining on the sill or adjacent wall after rain, condensation between the panes within the first few years, or operational problems that develop quickly all suggest installation shortcuts. Our 10-year workmanship warranty covers installation quality directly — if something is wrong with how a window was installed, that is our responsibility to address.
Ready to Replace Your Windows the Right Way?
We start with an on-site assessment of every opening — frame condition, flashing, rough opening integrity — so the installation method is right before anything is ordered.
- Full opening inspection with photo documentation
- Cut-back vs. pocket-fit recommendation explained clearly
- No deposit required to get started
- 10-year workmanship warranty on every installation