
Door Installation Process — What Correct Installation Involves and Why It Determines Long-Term Performance
Door installation is where most long-term door problems are created or prevented. The door itself — the material, the brand, the construction quality — matters. The installation details matter more. A correctly manufactured door installed without a sill pan, with failed head flashing integration, or shimmed out of square will leak, rot, and fail to seal in ways that have nothing to do with the door product and everything to do with how it was put in. The installation details that determine long-term performance are specific and verifiable — sill pan flashing, head flashing integrated with the WRB, perimeter shimming and leveling, air sealing, and correct threshold and weatherstripping setting. This page covers what correct door installation involves, what we do on every project, and what the installation details look like that prevent the problems covered in the common door problems section. For the full door overview see the door replacement overview.
See It Done — Full French Door Installation Timelapse
Before the step-by-step: here’s what a complete front entry french door replacement looks like from tear-out to finished install in the Austin area. Rough opening assessment, sill pan flashing, door unit setting and shimming, head flashing, trim, and final adjustment — every step covered below is in this video.
Why Installation Details Determine Long-Term Performance
The door manufacturing industry produces good products at multiple price points. The failures that show up five and ten years after installation — frame rot, persistent leaks, doors that never sealed correctly — almost always trace to installation details rather than product defects. Two identical doors installed side by side, one with correct flashing and one without, will perform differently within a few years in ways that look like a product problem but are actually an installation problem.
Sill Pan Flashing
The sill pan is a sloped pan installed at the base of the rough opening before the door unit goes in. Its job is to collect any water that gets past the threshold and direct it out the weep holes at the exterior — rather than into the wall cavity and the framing below. A door installed without a sill pan relies entirely on the threshold seal to keep water out. When that seal degrades — which it will — water enters the wall assembly directly. Most of the frame rot cases we see at the bottom of door frames trace to missing sill pan flashing on the original installation.
Head Flashing and WRB Integration
Head flashing above the door directs water that runs down the wall away from the door opening rather than into it. For head flashing to work correctly, it has to be integrated with the water-resistive barrier (WRB) behind the cladding — tucked under the WRB above and lapped over it below. Head flashing that isn’t correctly integrated with the WRB allows water to travel behind it and into the wall assembly at the top of the door. This produces water intrusion on the interior wall that appears to come from nowhere and is often misdiagnosed as a roof or window problem.
Shimming — Plumb, Level, and Square
A door unit that isn’t installed plumb, level, and square in the rough opening will never operate correctly or seal consistently — regardless of how good the door is. The door panel needs to hang plumb on the hinge side for the latch to align with the strike. The sill needs to be level for the threshold to seal uniformly across its full width. The frame needs to be square so the door panel contacts the weatherstripping evenly on all four sides when closed. Shimming done correctly takes time — it’s the step most often rushed on low-bid installations.
Air Sealing at the Rough Opening
The gap between the door frame and the rough opening framing needs to be filled and sealed — low-expansion foam applied in lifts rather than a single overfilled bead, and never high-expansion foam which bows the frame and affects door operation. The exterior perimeter needs to be caulked with a permanently flexible sealant that moves with thermal expansion and contraction without cracking or losing adhesion. Both the interior and exterior air sealing matter — the two together create the continuous air barrier that makes the door perform to its energy rating.
Our Installation Process — Step by Step
Every door installation we do follows the same process — the steps don’t change based on project size or door price point. Here’s what happens from the time we arrive to the time we leave.
Site Protection and Prep
Interior flooring and surrounding surfaces are protected before any work begins. On entry door replacements the interior entry area is covered. On patio door replacements the interior flooring at the opening is protected. This isn’t a courtesy step — it’s a standard that reflects how we work on every project regardless of scope.
Existing Door and Frame Removal
The existing door is removed carefully — interior and exterior trim is taken off to expose the full rough opening. We photograph the condition of the rough opening before any work begins. If deterioration is found — framing damage, rot, failed flashing — we document it and discuss the additional scope with the homeowner before proceeding. Nothing is covered up without being shown and explained first.
Rough Opening Assessment and Prep
The rough opening is checked for plumb, level, and square. Any framing damage found is corrected. The sill is cleaned and prepared for sill pan installation. The WRB condition at the head and sides is assessed — if the WRB needs repair or extension for correct head flashing integration, that’s done before the door goes in.
Sill Pan Flashing Installation
A correctly sloped sill pan is installed at the base of the rough opening before the door unit. OSI products are used for flashing throughout — adhesive flashing tape at corners and transitions, compatible with the WRB and cladding systems on the home. The sill pan extends up the sides of the rough opening to direct any water that enters out the weep path at the exterior rather than into the wall cavity.
Door Unit Setting and Shimming
The door unit is set in the rough opening and shimmed plumb, level, and square before any fasteners are driven. Hinge side plumb is checked first — it determines everything else. Sill level is checked across the full width. Frame square is confirmed with diagonal measurements. Shims are set at each hinge location, at the strike plate, at the head, and at the sill corners. Only after all checks confirm correct positioning are through-frame fasteners driven.
Head Flashing and WRB Integration
Head flashing is installed and integrated with the WRB — tucked under the WRB above the door and lapped over the WRB below. The integration sequence is specific: the flashing has to divert water at every lap in the correct direction so that water moving down the wall exits at the exterior rather than entering the wall assembly. Flashing tape seals all transitions and penetrations at the head.
Insulation and Air Sealing
The gap between the door frame and the rough opening framing is filled with low-expansion foam applied in multiple lifts — not a single overfilled bead, and never high-expansion foam which bows the frame and affects door operation. The foam fills the gap completely without applying inward pressure on the frame. Interior and exterior air sealing is completed before trim is installed.
Trim, Hardware, and Final Adjustment
Interior and exterior trim is installed and finished. Hardware is installed and adjusted — threshold set to correct contact pressure, door swing checked, latch and deadbolt engagement confirmed. On sliding patio doors, roller height is adjusted, track is cleaned and lubricated, and lock engagement is confirmed. The door is operated multiple times to confirm smooth operation and correct sealing before we call the job complete.
Cleanup and Walkthrough
All debris is removed and the work area is left clean. We walk the homeowner through the completed installation — operation of the door, hardware function, threshold adjustment access, and warranty information. We leave the site the way we found it with one difference: a correctly installed door where the previous one was.
Installation Specifics by Door Type
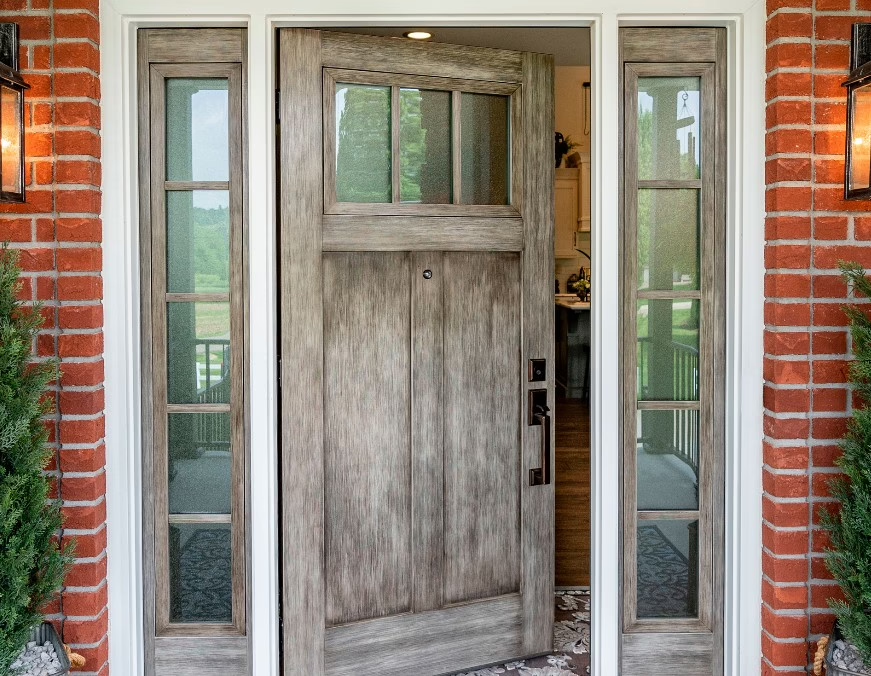
Entry and French Doors
- Hinge side plumb is the primary setting dimension — everything else follows from it
- Multi-point lock systems require precise frame square for all lock points to engage correctly
- French door inactive panel set and flush bolt adjustment before active panel is hung
- Sill pan and threshold setting are critical — entry doors take direct weather at the threshold
- Head flashing integration with WRB — most important detail on south and west exposures
- Exterior caulk with permanently flexible sealant at full frame perimeter
Sliding Patio Doors
- Sill level across full width — roller height adjustment only compensates for minor variation
- Sill pan installation is critical — sliders have larger glass area and more direct water exposure at the sill
- Fixed panel set and secured before sliding panel is installed
- Roller height adjusted so sliding panel contacts meeting rail weatherstripping uniformly
- Track cleaned and lubricated before sliding panel is installed
- Lock engagement confirmed at correct roller height setting
Storm Doors
- Storm door frame is mounted to the existing door brick mold — brick mold condition is assessed before installation
- Frame plumb and level checked independently — the existing entry door frame may not be perfectly plumb
- Closer and chain adjustment for correct swing speed and hold-open position
- All four corners sealed at the frame-to-brick-mold interface
- Screen and glass panel operation confirmed before job is called complete
Storm door installation is a separate scope from entry door installation — typically a one-person, half-day job on a straightforward opening.
What We Check Before Ordering
- Rough opening dimensions measured at multiple points — openings are rarely perfectly uniform
- Framing condition assessed — soft spots, previous rot repair, or out-of-square conditions flagged before ordering
- Sill condition — level, solid, and capable of supporting a sill pan correctly
- WRB condition at head — repair or extension needed before head flashing can be correctly integrated
- Brick mold or exterior trim condition on entry doors — affects whether trim replacement is needed as part of scope
Frequently Asked Questions
How long does a door installation take?
A single entry door replacement — remove existing door, prep rough opening, install new door, trim and finish — typically takes four to six hours for a two-person crew. A patio door replacement is similar. French door replacements take longer — six to eight hours depending on the rough opening condition and whether structural work is needed. Storm door installation is typically two to three hours. Scope expands if framing damage is found at tear-out — we document and discuss before proceeding.
What is a sill pan and why does it matter?
A sill pan is a sloped pan installed at the base of the rough opening before the door goes in. Its purpose is to collect any water that gets past the threshold and direct it out weep holes at the exterior — rather than into the wall cavity and the structural framing. Without a sill pan, the threshold seal is the only thing between rainfall and the framing below the door. When that seal wears — which it will — water enters the wall directly. Most door frame rot at the base traces to missing sill pan flashing on the original installation.
What happens if you find frame damage when removing the old door?
We photograph what we find and discuss it with the homeowner before doing anything. If framing damage is minor — a soft spot at the sill that hasn’t reached the structural framing — we describe the extent, the correction, and the additional cost before proceeding. If the damage is more significant — rotted king studs, deteriorated header, framing that needs replacement before a new door can be installed correctly — we explain the full scope of what’s required. Nothing is covered up without being shown first.
Why do you use OSI products for flashing?
OSI flashing products are compatible with the range of WRB systems and cladding materials we encounter on Central Texas homes — housewrap, felt, foam-backed systems, and direct-applied stucco. Compatibility between the flashing tape, the WRB, and the cladding matters for adhesion and long-term performance. Using a consistent flashing system across all projects means we know how the materials behave together rather than improvising compatibility on every job.
What’s included in your workmanship warranty on door installations?
Our 10-year workmanship warranty covers the installation itself — the flashing, the shimming, the sealing, and the operation of the door as installed. If a leak, draft, or operational problem develops that traces to an installation defect rather than product wear or homeowner damage, we correct it at no charge. This is separate from the manufacturer warranty on the door product itself — ProVia, Pella, and Anlin all carry their own product warranties that cover manufacturing defects, finish, and in Anlin’s case, accidental glass breakage.
Ready to Replace a Door the Right Way?
We’ll assess the existing opening, give you a written scope that includes all flashing and installation details, and install it correctly the first time. No deposit required.
- Free rough opening assessment included
- No deposit required to get started
- Written scope before any work begins
- 10-year workmanship warranty on every installation