
T1-11 Siding in Austin, TX — What It Is, How It Fails, and What Replacement Involves
T1-11 siding is a large-format plywood or OSB panel product with routed vertical grooves that mimic board-and-batten siding — installed on millions of American homes, garages, and additions from the 1960s through the 1990s. It was widely used in Austin’s residential and light commercial construction during that era because it was inexpensive, fast to install, and served as both cladding and sheathing in a single layer. T1-11 fails predictably and aggressively in Central Texas conditions: the bottom edges and panel seams absorb moisture, the plywood or OSB substrate swells and delaminates, and the grooves — designed to look like individual boards — become water channels that accelerate deterioration. Cupcake Home Improvements replaces T1-11 regularly across Austin-area homes, garages, and accessory structures, and it is among the most common substrates we find hiding underneath vinyl that was installed without tear-off. This page covers what T1-11 is, how it fails, why it remains so prevalent in this market, and what replacement involves. For the full material comparison, see the siding types overview or the siding replacement overview.
What Is T1-11 Siding?
T1-11 (also written T111) is a panel siding product manufactured in 4×8 sheets — the same dimensions as standard plywood sheathing — with parallel vertical grooves routed or pressed into the face at regular intervals, typically every 8 inches. The grooves create the appearance of individual vertical boards from a distance. The panels install vertically, overlap at horizontal Z-flashing joints on two-story applications, and nail directly to the framing.
The product is available in two substrates: exterior-grade plywood and oriented strand board (OSB). Plywood T1-11 performs better and lasts longer under moisture exposure. OSB T1-11 — the cheaper variant — is significantly more vulnerable to moisture intrusion and fails faster when seals are compromised. Both versions were used extensively in Austin-area construction, and both are past their service life on homes from this era.
Why T1-11 Was Popular in Austin Construction
- Single panel serves as both cladding and sheathing — fewer materials, faster install
- 4×8 sheets cover large areas quickly with minimal cutting
- Board-and-batten appearance without the labor of individual boards
- Lower material cost than solid wood or fiber cement alternatives
- Widely available and familiar to framers already working with plywood
Why T1-11 Fails in Central Texas
- Bottom edges sit at or near grade — direct moisture contact and capillary wicking
- Routed grooves collect and channel water into the panel face
- Horizontal seams between panels require Z-flashing that was frequently skipped or fails over time
- OSB variant swells aggressively once face seal is compromised
- Fastener holes and cut edges allow moisture into the panel core
- No redundant water management — when the paint fails, the substrate is directly exposed
For what these failures look like in the field, see siding rot and soft spots →
Where T1-11 Appears on Austin-Area Properties
T1-11 shows up in three distinct situations on Central Texas properties, and each has a different replacement scope and complexity.
Original Home Cladding — 1970s–1990s
Homes built during Austin’s growth period frequently used T1-11 as the primary exterior cladding, especially on ranch-style and split-level homes where the vertical groove look suited the architecture. These installations are now 30–50 years old. Most are past their service life even where they haven’t yet visibly failed.
Garages, Additions, and Accessory Structures
T1-11 was the standard cladding for detached garages, additions, and outbuildings in this era — partly because its combination sheathing-and-cladding function simplified construction on secondary structures. It’s extremely common on garages attached to homes that have already had their primary siding replaced, creating a mismatched exterior that homeowners often address at the same time.
Hidden Beneath Vinyl — The Cover-Up Pattern
Like Masonite hardboard, T1-11 was frequently covered over with vinyl siding during the 1990s and 2000s re-siding wave — nailed directly over the existing T1-11 without removal. The T1-11 underneath continued absorbing moisture with no path to dry, and by the time the vinyl is being replaced today, the substrate condition ranges from degraded-but-sound to fully rotted through to the framing.
Gables and Accent Sections on Mixed Exteriors
Some Austin homes used T1-11 only on gable ends or upper-story sections while using a different cladding on the main field. These partial installations are often the last section to be addressed on a re-side and can be easy to miss during a visual inspection if access to upper elevations is limited.
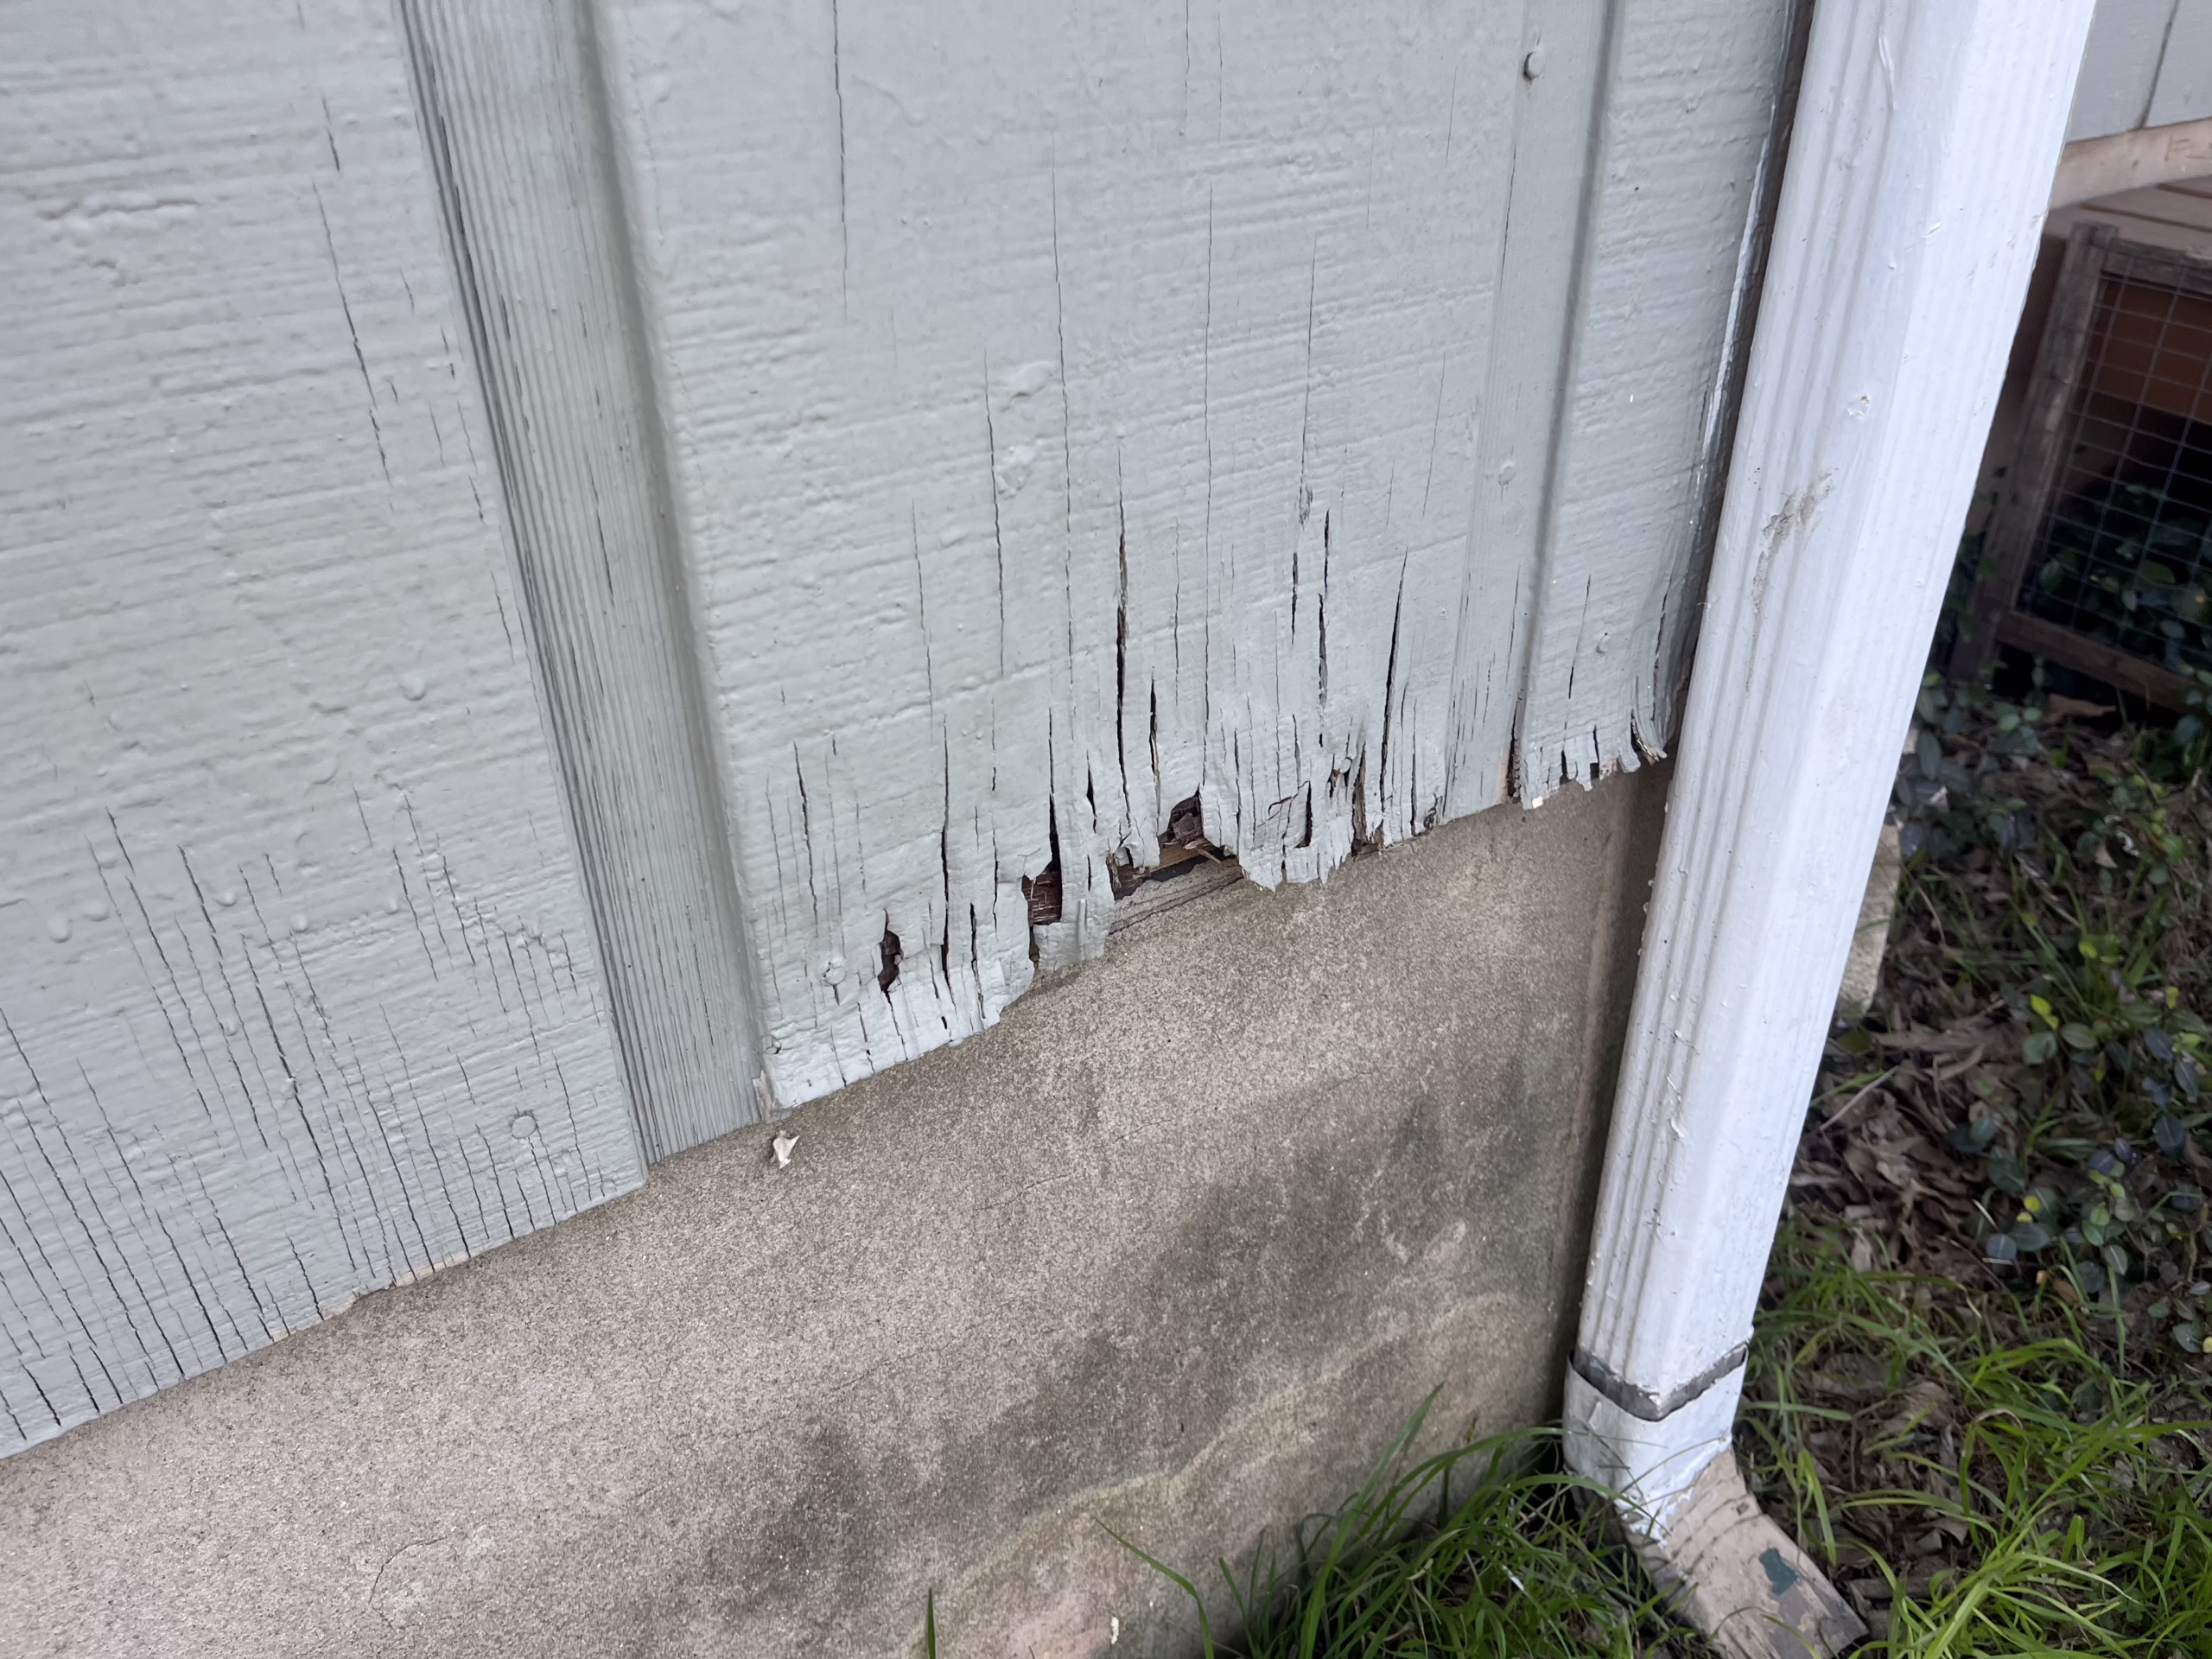
How T1-11 Siding Fails
T1-11 failure is driven primarily by moisture finding its way into the panel substrate — and the design of the product creates multiple entry points that are difficult to permanently seal. Once moisture is inside the panel, the failure sequence is aggressive.
Seal Failure
Paint and caulk at bottom edges, grooves, seams, and fastener holes begin to fail. Once the seal is compromised, moisture enters the panel substrate directly.
Edge Swelling
Bottom edges and horizontal seam edges — the most exposed points — absorb moisture and begin to swell. The swelling is visible as raised, irregular edges and buckling panel faces.
Delamination
Plywood layers or OSB strands begin to separate as the binder breaks down with repeated moisture cycling. The panel face separates from the substrate in sections.
Wildlife Entry
Softened, delaminating T1-11 is targeted by woodpeckers — the grooves are natural drilling points, and degraded panels sound hollow. Animal damage on T1-11 is almost always a symptom of underlying moisture deterioration, not a standalone wildlife problem.
Structural Rot
With sustained moisture at the panel-to-framing interface, rot progresses into the sheathing and framing. At this stage new cladding cannot go on until framing repairs are complete.
The grooves that define T1-11’s appearance are a particular problem — they create horizontal ledges at each groove base that collect water and direct it into the panel face rather than allowing it to run off cleanly. Properly sealing those grooves at installation was difficult and required frequent maintenance. Most installations from this era never received that maintenance consistently, which is why grade-contact failure and groove-driven deterioration are the two most common failure patterns we see. The common siding problems overview covers all of these symptoms and what each one indicates about where in the failure sequence your home currently sits.
T1-11 Hidden Beneath Vinyl: What We Find
The most consequential T1-11 situation on Austin-area homes isn’t visible failing panels — it’s T1-11 that was covered over with vinyl during a re-side and hasn’t been seen since. This is the same pattern we document on Masonite hardboard, and it’s equally common with T1-11 on homes from this era.
The Spectrum of What We Find at Tear-Off
When vinyl comes off a home with T1-11 underneath, the range of conditions we encounter is wide: panels that are structurally intact but aged and need full removal before new cladding goes on; panels that are swollen and delaminating at edges and seams; and panels that have allowed moisture through to the sheathing and framing, requiring structural correction before any new cladding can be installed. The condition of the T1-11 drives the scope and cost of the project — and it can’t be fully assessed until tear-off is complete.
We document everything we find before any work proceeds. You see the wall condition with photos before scope is finalized. The siding appointment page explains how that process works from first call through completion.
Replacing T1-11 Siding
T1-11 replacement always involves full tear-off — there is no scenario where we install new cladding over existing T1-11, regardless of its apparent condition. The combined sheathing-and-cladding function of T1-11 means that removing it exposes the framing directly, which requires new sheathing to be installed as part of the replacement scope. This is different from replacing hardboard or vinyl, where the original sheathing often remains intact beneath the cladding.
✓ What Goes On After Tear-Off
New structural sheathing, Hardie Wrap WRB, preferred-standard flashing at all transitions, then James Hardie fiber cement cladding and trim. The complete wall system is built correctly from the framing out — not patched over what was there.
⚠ Scope Variable: Framing Condition
If T1-11 has been allowing moisture to contact the framing for years, structural repairs are required before sheathing goes on. This is the most common scope variable on T1-11 projects and the reason full cost can’t be determined until tear-off is complete.
✗ What We Won’t Do
Install new cladding over existing T1-11. Install new cladding over vinyl sitting over T1-11. Scope a project without assessing the framing condition after tear-off. No exceptions.
Because T1-11 replacement involves new sheathing as a standard scope item, the cost per square foot typically runs slightly higher than a hardboard or vinyl replacement on an equivalent home. A detailed breakdown is on the siding cost page. The siding installation checklist covers what a complete installation includes from start to finish.
Frequently Asked Questions
What is T1-11 siding and why was it used so widely?
T1-11 is a 4×8 plywood or OSB panel with routed vertical grooves that mimic board-and-batten siding. It was used widely from the 1960s through the 1990s because a single panel served as both cladding and structural sheathing — eliminating one layer of material and labor. In Austin’s residential construction boom of the 1980s and early 1990s, it was a standard cladding choice on homes, garages, and additions throughout the metro.
How do I know if my home has T1-11 siding?
T1-11 is recognizable by its vertical groove pattern — parallel routed channels spaced evenly across large panels, most commonly 8 inches apart. The panels are typically 4 feet wide with horizontal seams at 8-foot intervals on two-story applications. If your home was built or last re-sided between the 1970s and mid-1990s and has a vertical groove appearance, T1-11 is likely what you have. If it has vinyl on it, T1-11 or Masonite hardboard may be underneath — a professional inspection at seams and trim edges can often confirm this without full tear-off.
Can T1-11 siding be repaired rather than replaced?
Isolated sections can be replaced if the surrounding panels are structurally sound and the damage is confined — a single panel on a detached garage, for example, where the rest of the structure is in good condition. On a primary residence with widespread moisture damage, partial repair is rarely the cost-effective answer because T1-11 failure tends to be systemic rather than isolated. Additionally, because T1-11 serves as structural sheathing, any panel replacement involves re-establishing that structural function — it’s not a simple swap of decorative cladding.
Why do woodpeckers target T1-11 siding?
Woodpeckers drill into T1-11 for two reasons: the routed grooves are natural drilling points that the birds recognize as structural features in wood, and deteriorating T1-11 sounds hollow when tapped — which signals insects and larvae to foraging woodpeckers. The animal damage is almost always downstream of moisture deterioration rather than a standalone wildlife problem. Repairing woodpecker holes in T1-11 without addressing the underlying moisture damage produces temporary results — the birds return because the substrate conditions that attracted them haven’t changed.
Does T1-11 replacement require new sheathing?
Yes, always. Because T1-11 serves as both cladding and structural sheathing in a single panel, removing it exposes the framing directly. New structural sheathing must be installed before any new cladding goes on — this is a standard scope item on every T1-11 replacement project, not an add-on that only applies when damage is found. It’s one reason T1-11 replacement typically costs slightly more per square foot than replacing hardboard or vinyl over intact sheathing.
How much does T1-11 siding replacement cost in Austin?
Installed cost for T1-11 replacement with fiber cement in the Austin metro typically runs $15 to $22+ per square foot, reflecting the sheathing replacement that is always part of the scope. Projects where moisture has reached the framing add structural repair costs that can’t be fully determined until tear-off is complete. A detailed cost breakdown by project type is on the siding cost page. The accurate number for your specific home comes from a free on-site assessment.
Have T1-11 Siding? Find Out What’s Behind It Before It Gets Worse.
We’ll tell you what we find, what it means for scope, and what replacement actually involves — before anything is priced or ordered. Review what to expect on your appointment before we talk so you can feel great about your appointment.
- Full framing and substrate assessment at no cost
- No deposit required to get started
- Written scope before any work begins
- 10-year workmanship warranty on every installation